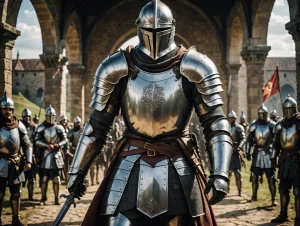
Embark on a creative adventure that transcends the ordinary and transforms festive remnants into a knightly masterpiece.
Crafting a knight’s helmet from leftover Christmas boxes not only repurposes seasonal packaging but also unleashes your imagination on a journey through time.

Ready your crafting materials, and let’s embark on a DIY quest to forge a medieval helmet that captures the spirit of knighthood and the magic of the holidays.
Here’s a step-by-step guide to help you make your very own medieval helmet:

Materials Needed
1. Leftover Christmas boxes (medium to large size)
2. Craft paper or construction paper in silver or metallic color
3. Aluminum foil
4. Pencil and ruler
5. Craft knife or scissors
6. Glue or tape
7. Elastic cord or ribbon
8. Hole punch (optional)
9. Markers or colored pencils (optional)
Step 1: Design Your Helmet
Sketch the design of your knight’s helmet on a piece of paper. Consider the shape of the helmet, including the visor and any additional details.

Step 2: Prepare the Box
Select a medium to large-sized Christmas box. Open the box and flatten it out, so it can be cut and shaped into the helmet.

Step 3: Cut Out the Helmet Shape
Using your sketch as a guide, carefully cut out the helmet shape from the flattened box. Ensure that the box material is large enough to cover your head comfortably.
Step 4: Shape the Helmet
Mold the flattened box into the desired helmet shape. This may involve cutting and folding to achieve the rounded contours of a knight’s helmet.
Step 5: Cover with Craft Paper
Cut strips of silver or metallic-colored craft paper and glue or tape them onto the cardboard helmet. This will give your knight’s helmet a shiny and metallic appearance.

Step 6: Create the Visor
Cut out a rectangular piece for the visor and attach it to the front of the helmet. You can leave it down or cut it into a distinctive visor shape that can be lifted.

Step 7: Add Details with Aluminum Foil
Crumple up pieces of aluminum foil and glue them strategically onto the helmet to create rivets, trim, or other decorative elements.
Step 8: Punch Holes for the Straps
If you’re using elastic cord or ribbon as a strap, punch holes on each side of the helmet to thread the straps through. Make sure the helmet fits securely on your head.

Step 9: Attach Straps
Thread the elastic cord or ribbon through the holes and tie knots to secure them. This will allow you to wear the helmet comfortably.
Step 10: Personalize and Decorate (Optional)
Use markers or colored pencils to add additional details or personal touches to your knight’s helmet. You can create crests, symbols, or other decorations.
Once you’ve completed these steps, you’ll have your very own homemade knight’s helmet. Wear it proudly and perhaps pair it with a cardboard sword and shield for the complete medieval knight look!